Intro
Previously on our Web Testing Series
We learnt how to set up a testing environment with Nightwatch and successfully wrote our first end-to-end test. Here is a quick recap,
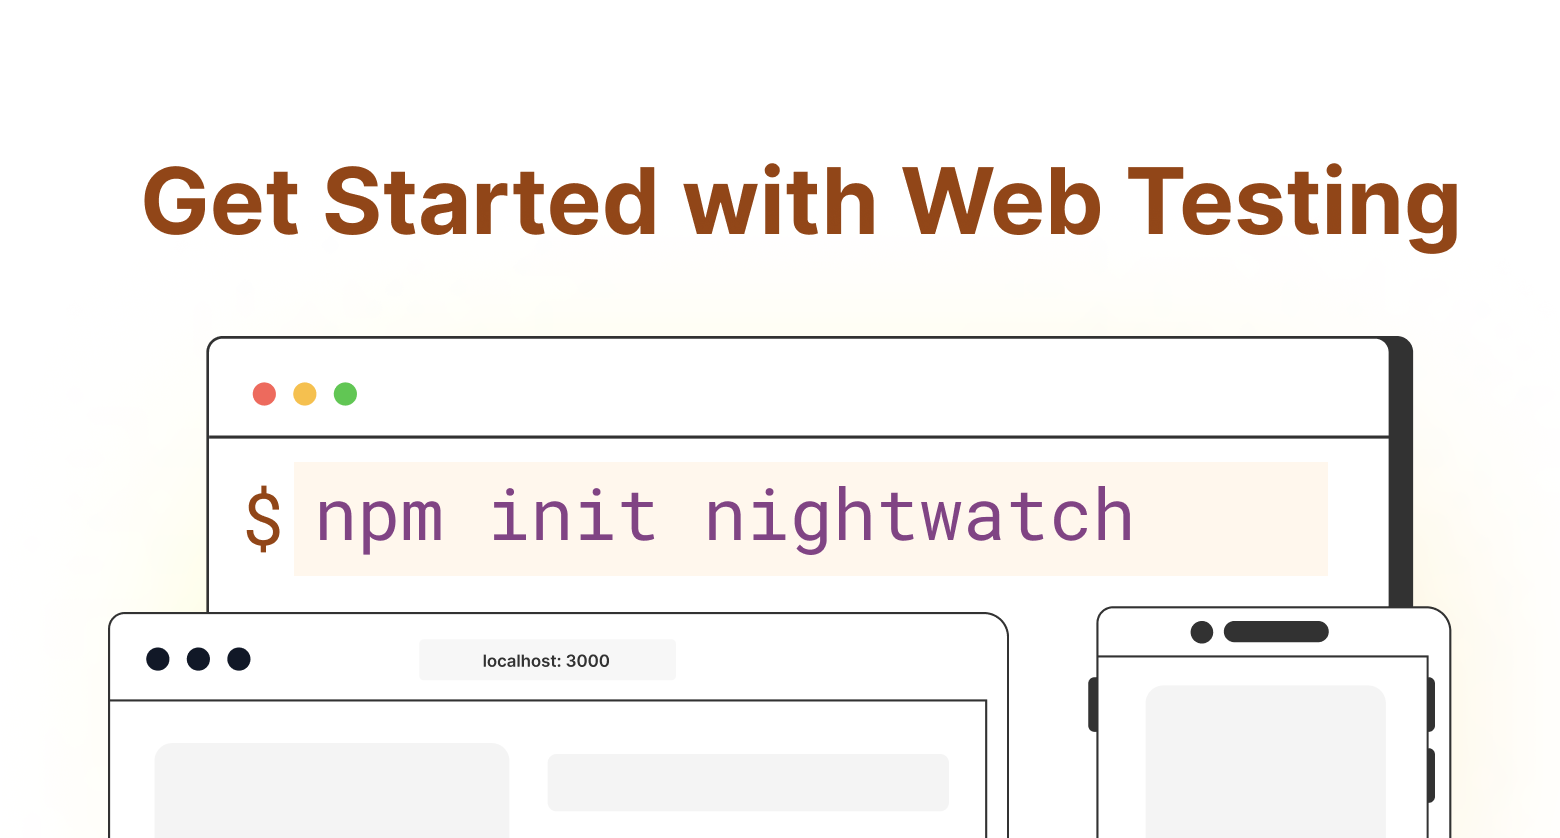
Install: npm init nightwatch
Write: browser.navigateTo('/').assert.textEquals('h1', '<TEXT>')
Run: npx nightwatch test
Overview of this Post
Checking a text isn't enough of an end-to-end test for ensuring the reliability of websites and web apps. The web is made of complex elements and involves a lot of user interactions. In this tutorial, we'll teach you how to test some of the common scenarios continuing from the first test we wrote.
Writing web tests majorly surround these 3 components,
- Finding an element
- Interacting with the element
- Testing the element and its properties
We'll cover these three primary aspects of testing to be able to write tests for the following scenarios.
- Click the "Get Started" button and verify if we've gone to the installation page.
- Click on Search, type the query "frame", wait for the results, press the down arrow to the second result, and press enter. Verify if we've gone to the
.parentFrame()documentation page.
You can also watch the video tutorial of this post.
Find 👀
The first step in web testing is to find DOM elements in the page we want to test. Nightwatch allows you to find elements using a variety of selectors. The most common approach is to use CSS selectors. You can do this using the .element.find() API.
Beyond that, you can search for elements on the page through various other means shown below. In the following examples, we'll use .find(), .findByText() and .findByPlaceholderText(). You can learn more about all the selectors available here.
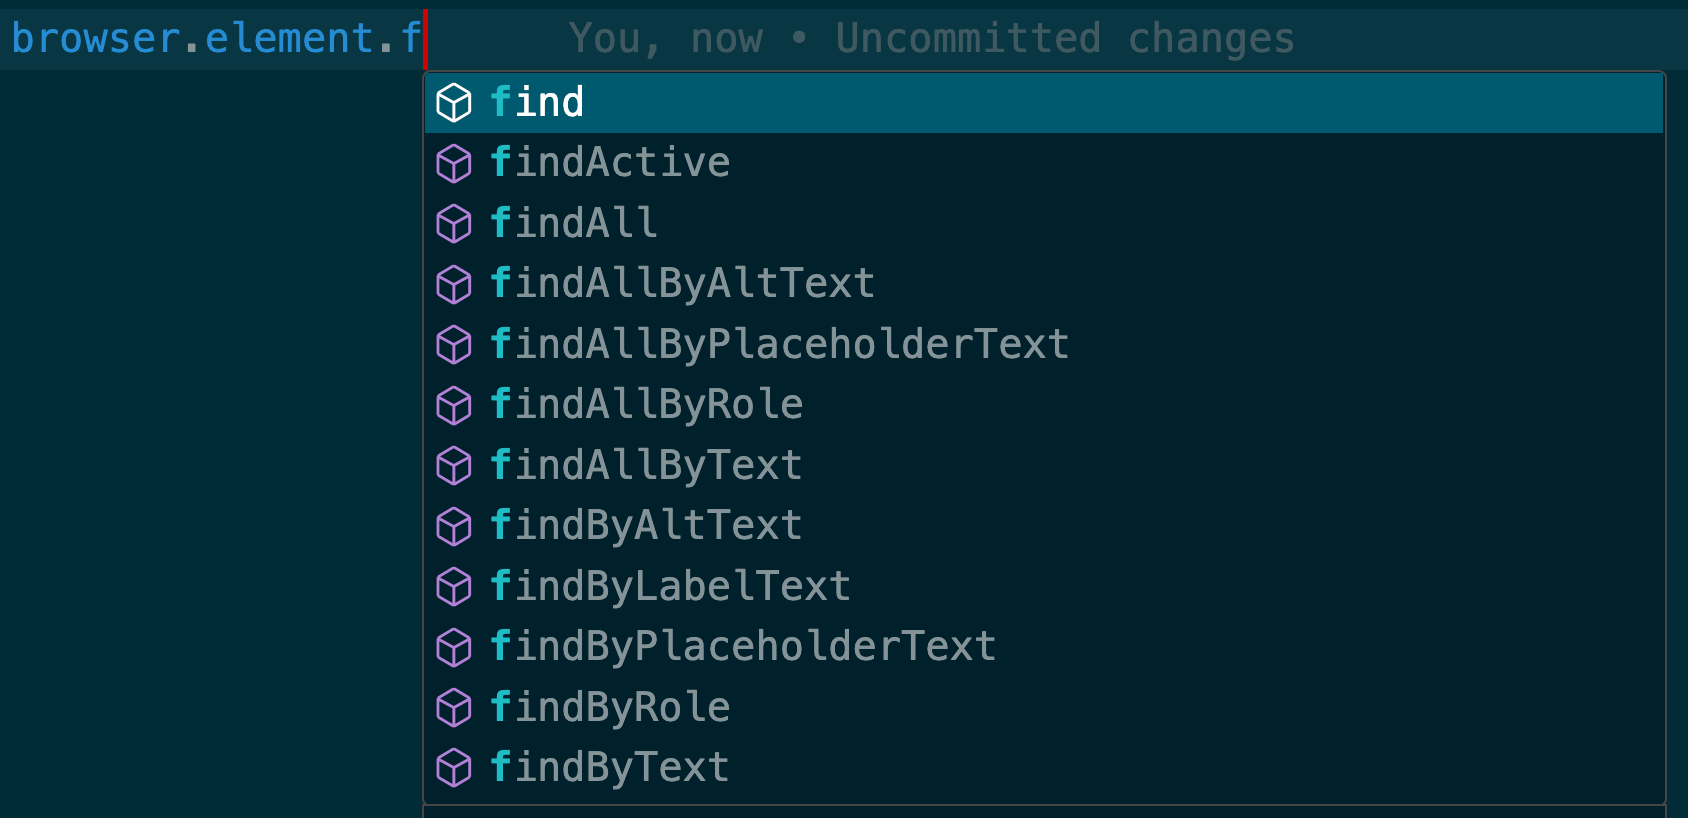
You can also keep searching deeper inside elements by chaining all the find APIs. This really makes it easy to get the exact element you want.
Example:
browser.element.find('main').find('.hero').findByText('Get Started')Waiting
Sometimes the element we're looking for isn't ready, and we might need to wait for it. A good example is typing in an input box and waiting for the results to be populated. You can do this using the .waitUntil(<status>) API.
.find(<string>) - The string should be a valid CSS Selector .findByText(<string>) .findByPlaceholderText(<string>) .waitUntil(<string>) - The <string> can be any of the following: "visible", "not.visible", "selected", "not.selected", "enabled", "not.enabled", or "disabled"Example:
// Find the element with class "DocSearch-Modal" and wait for it to be visible
browser.element.find('.DocSearch-Modal').waitUntil('visible')
Now that we've learnt how to find an element, we can move on to interacting with it.
Interact ✍️
The next step is to interact with the web. The most common scenarios are users clicking a button or filling out a form. This part of testing becomes essential when testing a dynamic web app or website.
Nightwatch helps you simulate these actions through the element Interaction API browser.element.find().<interaction_api>(). These are the available interaction APIs: clear, click, dragAndDrop, sendKeys, setAttribute, setProperty, submit, update, upload, submitForm, updateValue, uploadFile, clickAndHold, doubleClick, rightClick and moveTo.
Beyond this, you can also do complex user actions using .perform(). But for the scope of this blog, we'll only be using .click() and .sendKeys().
.click() - Clicks the element we've found.sendKeys(<string | [...keycodes]>) - The keyboard input to be sent to the selected element→ arg:
<string> The text to send as keyboard input. e.g., .sendKeys("hello world!")→ arg:
<[...keycodes]> You can also send a list of strings and keycodes, including the special keys found under browser.keys.<special_key>. e.g., .sendKeys([browser.Keys.TAB, "hello", browser.Keys.ENTER]). You can find the list of special keys here.Example:
// Find the button "Get Started" and click it
browser.element.findByText('Get Started').click()

// Find the input box with placeholder "Search docs" and type "frame"
browser.element.findByPlaceholderText('Search docs').sendKeys('frame')

// Press the down arrow and press Enter
browser.element.findByPlaceholderText('Search docs').sendKeys([browser.Keys.ARROW_DOWN, browser.Keys.ENTER])
Now that we've learnt how to interact with an element, we can move on to verifying aspects of it.
Assert ✅
The final step is to test if what we're looking for matches what's present on the web page. This involves taking the attribute of the element we need and verifying it.
Finding the attribute
The most commonly tested aspects of an element are its text, attributes (including class), and value (for input elements). This can be achieved using .getText(), .getAttribute() and .getValue(). You can read more about all the element states here.
Testing
Once we have found the value we need, the next step is to test it. The tests can be written as loosely or as strictly as you prefer based on these three methods: equals, contains and matches.
.assert.equals(<str>) - takes a string and checks if it's exactly the same..assert.contains(<str>) - takes a string and checks if the input is present as a substring..assert.matches(<regex>) - takes a regex as input and verifies against it.Example:
// Check if the h1 text contains "Install Nightwatch"
browser.element.find('h1').getText().assert.contains('Install Nightwatch')

// Check if the "autocomplete" attribute of the input box is exactly "off"
browser.element.findByPlaceholderText('Filter by title').getAttribute('autocomplete').assert.equals('off').verify instead of .assert to log the failure and continue with other assertions in the test.Negation
To check if something should "not" be equal or should "not" contain, it's as simple as adding a .not after the .assert.
// Check if the h1 does not text contains "Selenium"
browser.element.find('h1').getText().assert.not.contains('Selenium')
Element Status
You can assert the state of the element using .visible(), .present(), .selected() and .enabled() after the .assert. This is very similar to the .waitUntil status we learnt earlier in the waiting section and can be used interchangeably.
// Check if the element with class "DocSearch-Dropdown-Container" is present
browser.element.find('.DocSearch-Dropdown-Container').assert.present()
Document Status
You can assert the title and URL of the document using the browser.assert.url[Contains/Matches/Equals](<string>) and browser.assert.title[Contains/Matches/Equals](<string>).
// Check if the title contains "Getting Started"
browser.assert.titleContains('Getting Started')globals object in the nightwatch.json file. Read more.Putting it all together 🧩
With all the things we've learnt so far, let's write tests for these two scenarios.
Scenario: Should lead to the installation page on click of "Get Started"
Code
  it('Should lead to the installation page on click of Get Started', function (browser) {
    browser.navigateTo('/')
    browser.element.findByText('Get Started').click()
    browser.element.findByPlaceholderText('Filter by title').waitUntil('visible')
    browser.element.find('h1').getText().assert.equals('Install Nightwatch')
    browser.assert.titleEquals('Getting Started | Developer Guide | Nightwatch.js')
    browser.assert.urlContains('nightwatchjs.org/guide/quickstarts')
    browser.element.findByPlaceholderText('Filter by title')
      .getAttribute('autocomplete').assert.equals('off')
    ;
    browser.end()
  })
Explanation
First, we navigate to the home page using .navigateTo('/'). This is possible because previously, in the setup of our project, we set the base_url of our project to be the Nightwatch home page. You can edit this in the nightwatch.conf.js file. After the navigation, we find the button with the text "Get Started" and click it. For situations when the link is routed in the front end and doesn't reload the page, it is recommended to wait for the action to complete. Here we'll wait for the left-side search bar to become visible. Then we'll check the installation page by asserting the title, the URL, and the h1 element. We'll also assert the "autocomplete" attribute of the search bar to showcase attribute assertions.
browser.end() closes the browser window. It's a good practice to finish the test with closing the browser.Scenario: Should allow search and show correct results
Code
  it('Should allow search and show correct results', function (browser) {
    browser.navigateTo('/')
    browser.element.find('#docsearch').click()
    browser.element.find('.DocSearch-Modal').waitUntil('visible')

    const search_input = browser.element.findByPlaceholderText('Search docs')
    search_input.sendKeys('frame')
    browser.element.find('.DocSearch-Dropdown-Container').assert.present()
    search_input.sendKeys([browser.Keys.ARROW_DOWN, browser.Keys.ENTER])

    browser.element.find('h1').getText().assert.contains('.frameParent')
    browser.end()
  })
Explanation
We'll navigate to the home page, find the search icon and click on it. We'll wait for the modal to open and be visible. Then we'll type in the text "frame" in the search input bar. We wait for the results to load by checking the presence of ".DocSearch-Dropdown-Container", and once the results are loaded, we'll press the down arrow and enter. This will lead to the docs of the second result .frameParent(), and we verify the h1 text to confirm that.
Final File
The final home.spec.js should look like this.
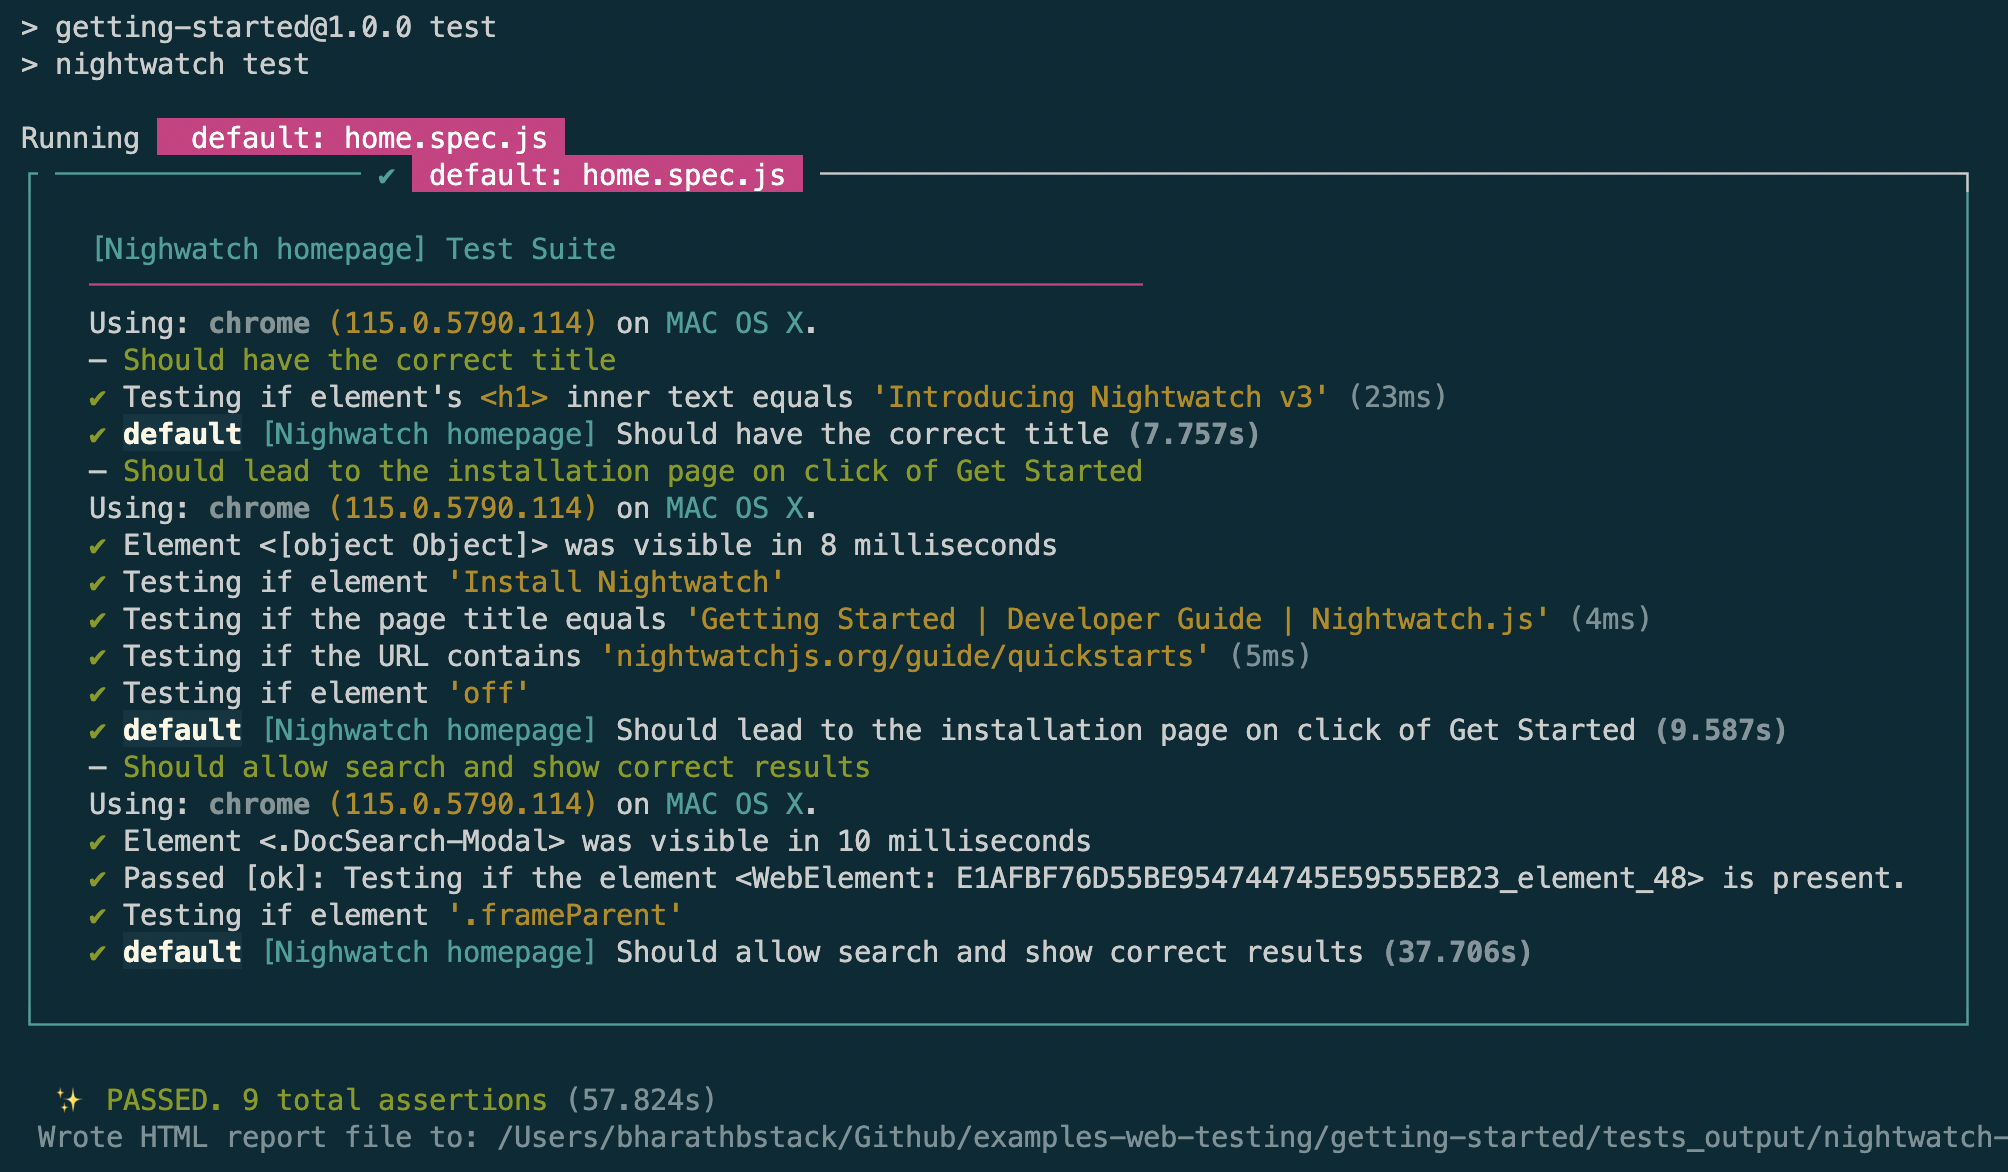
describe('Nighwatch homepage', function () {

  it('Should have the correct title', function(browser) {
    browser
      .navigateTo('/')
      .assert.textEquals('h1', 'Introducing Nightwatch v3')
      .end()
    ;
  })

  it('Should lead to the installation page on click of Get Started', function (browser) {
    browser.navigateTo('/')
    browser.element.findByText('Get Started').click()
    browser.element.findByPlaceholderText('Filter by title').waitUntil('visible')
    browser.element.find('h1').getText().assert.equals('Install Nightwatch')
    browser.assert.titleEquals('Getting Started | Developer Guide | Nightwatch.js')
    browser.assert.urlContains('nightwatchjs.org/guide/quickstarts')
    browser.element.findByPlaceholderText('Filter by title')
      .getAttribute('autocomplete').assert.equals('off')
    ;
    browser.end()
  })

  it('Should allow search and show correct results', function (browser) {
    browser.navigateTo('/')
    browser.element.find('#docsearch').click()
    browser.element.find('.DocSearch-Modal').waitUntil('visible')

    const search_input = browser.element.findByPlaceholderText('Search docs')
    search_input.sendKeys('frame')
    browser.element.find('.DocSearch-Dropdown-Container').assert.present()
    search_input.sendKeys([browser.Keys.ARROW_DOWN, browser.Keys.ENTER])

    browser.element.find('h1').getText().assert.contains('.frameParent')
    browser.end()
  })

})
Let's run the tests with the same command we learnt in the previous post.
npx nightwatch testAfter the browser is done with the tests, the output should look like this.
Coming up Next
Advanced Techniques and Scenarios in Web Testing
Today you learnt how to test the web for the common use cases using these three techniques → Finding, Interacting and Asserting. In the next chapter of our series on web testing, we will learn about advanced techniques in web testing, such as test hooks, multi-tab interactions, iFrames, copy/paste, using async/await, executing client JS, emulating geolocation, handling shadow DOM, actions API and more. Stay tuned for our upcoming post on Advanced Techniques and Scenarios in Web Testing.
Join Our Community 💬
If you have any questions, don't hesitate to visit our Discord server and say hello. Our community is always available to provide support, share insights, and assist you with any testing-related inquiries you may have. We welcome your active participation and look forward to connecting with you in our Discord community. You can also reach out to us via Twitter.
Happy testing! 🎉
Video Tutorial